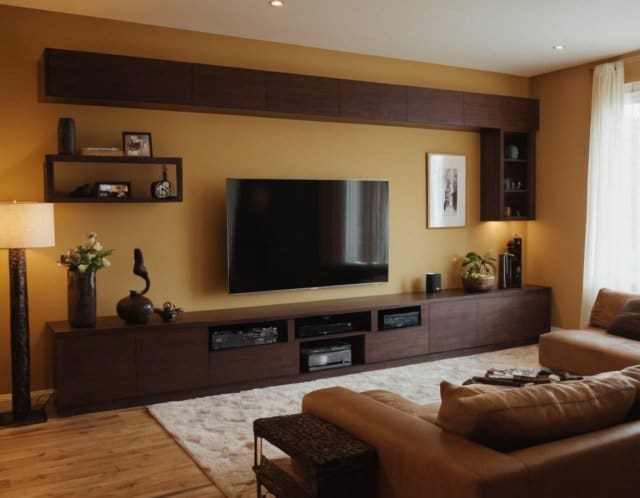
Mounting a TV on the wall not only saves valuable floor space, but it also adds a touch of modern elegance to any room. While the process might initially seem intimidating, fear not! With the right tools and a clear understanding of how to install a TV mount, it’s a task well within the reach of most DIY enthusiasts. Let’s walk through a step-by-step guide to help you achieve a professional-looking TV installation.

Gather Your Tools and Materials:
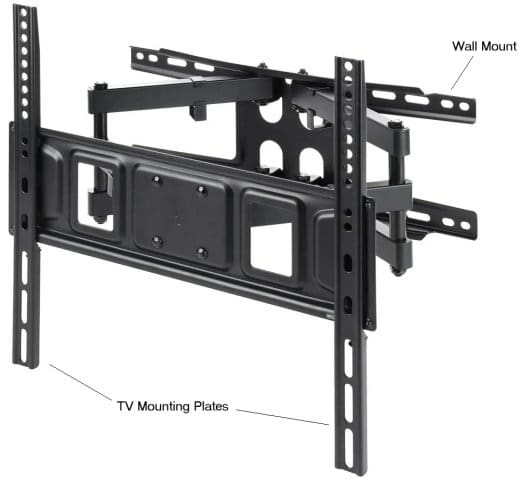
TV wall mount: Choose a mount that’s compatible with your TV’s size and weight, and offers the desired features (e.g., tilt, swivel, articulation). Wall mounts come in two parts. One is the wall mount, which attaches to the wall. The other is the TV plate, which mounts directly to your TV (this will usually be two pieces). Sanus is a well known company that makes TV mounts in many configurations.
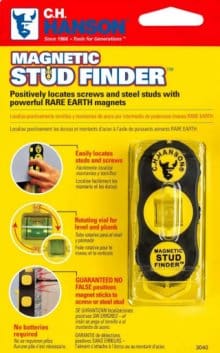
- Stud finder: Essential for locating the wall studs, which provide the necessary support for the mount. We prefer magnetic stud finders. They locate the screws used to attach the sheetrock to your studs. We like them because once stud is located you can leave the finder in place to avoid marking our walls.

- Level: To ensure your TV is mounted level.
- Drill and appropriate bits: For drilling pilot holes and securing the mount to the wall.
- Hammer drill and appropriate masonry bit: If your wall is concrete, brick or stone.
- Socket wrench: for installing the lag bolts that attach the mount to the wall.
- Screwdriver: For attaching the TV to the mount.
- Pencil: For marking the wall.
- Measuring tape: For accurate measurements.
- Safety glasses and gloves: To protect yourself during the installation process.
Choose the Right Location:
- Viewing distance: Consider the optimal viewing distance for your TV size and room layout.
- Height: Generally, the center of the TV should be at eye level (or slightly above) when seated.
- Wall type: Determine whether you’re mounting on drywall or concrete, as this will influence the type of anchors and bolts needed.
- Cable management: Plan how you’ll conceal the cables for a clean look.
How to Install a TV Mount on a sheetrock wall
- Use a stud finder: Locate and mark the studs in your desired location by running the stud finder along the wall to locate the vertical wooden beams (studs) behind the drywall.
- Mark the studs: Once you’ve found the studs, mark their center points with a pencil.
- Verifying location: When mounting a TV to a wall with studs you will need to verify the holes that are in the wall mount will align with the stud locations. Further you will need to make sure the stud locations will put your TV where you want it to be. It is okay to have the wall mount offset from your desired location as the part that mounts the tv to the wall mount will have some room for lateral play built into it. This is to allow for centering of your TV.
- Hold the wall mount on the wall in the verified location and mark the location for your bolts. Make sure to use your level to get the wall mount level and plumb on the wall.
How to install a TV Mount on a concrete, brick or stone wall
- Your hard surface wall must be in uncompromised condition. If the wall is in any way compromised or in less than perfect, solid condition it is not recommended to hang your TV on it.
- Find the desired location: It is best not to locate the mounting bolts too close to the edge of a brick or stone or into a seam between bricks or stones. It is preferable that the holes you drill into your wall are in the middle of the stone or brick.
- Mark the locations: Using your wall mount as template, mark the locations for the holes to be drilled. You will need at least 4 bolts holding the mount to the wall.
- Drill: Using your hammer drill and a masonry bit sized properly for your intended fastener, drill the holes for your fasteners. The fasteners required will vary depending on the composition of your wall. Cinderblock, brick and cement walls all require a different type of fastener. We will not get into the specific fasteners you should use. If you are not sure which fastener will work, it will be best to contact a pro to install your TV for you.

Install the Wall Mount
- Drill pilot holes: Drill pilot holes at the marked locations, using the appropriate bit size for your lag bolts.
- Secure the mount: Attach the mount to the wall using the provided lag bolts and a ratchet wrench. Leave the mount slightly loose for now.
- Use your level: Place the level on top of the wall mount and while tightening the bolts make sure the mount stays level. There is some play built into the slots in the mount for this purpose. Your mount must be perfectly level after final tightening.
- It is imperative that you have 4 lag bolts into at least 2 studs securing your mount to the wall.
Attach the TV Mounting Plate(s)
- Follow the mount’s instructions: Attach the TV mounting plate (bracket) to the back of your TV, following the manufacturer’s guidelines.
- Securely fasten the plate: Exercise caution when selecting the screws to attach the mount to the TV. Make sure the screws are not too long. If they are they can damage the internals of the TV. This will void your warranty. Use the provided screws and a screwdriver to attach the plate firmly to the TV.
Mount the TV on the Wall
- Lift and attach: Carefully lift the TV and hook the mounting plate onto the wall mount.
- Secure the TV: Most mounts have safety screws or locking mechanisms to secure the TV in place. Follow the instructions provided.
- Level: Once you have married the wall mount to the TV mounting plate you will need to center the set for your desired location and level the set. Most mounts have level adjustment built into them.
Connect Your Cables and Enjoy:
- Connect your devices: Connect your cable box, gaming console, or streaming devices to the TV.
- Conceal the cables: Use raceways or in-wall solutions to neatly hide the cables.
- Sit back and relax: Enjoy your newly mounted TV!
Pro Tips:
- Get help: Enlist a friend or family member to help you lift and maneuver the TV, especially if it’s large or heavy.
- Use the right tools and hardware: Refer to your TV mount’s instructions for the recommended tools and hardware.
- Consider professional installation: If you’re unsure or uncomfortable with the process, consider hiring a professional installer.
Learning how to install and tv mount can enhance your viewing experience and free up valuable floor space. With a bit of planning and careful execution, you can accomplish this task yourself and enjoy the results for years to come!
Inspired to Transform Your Space?
Ready to bring your home remodeling dreams to life? From custom cabinets to complete renovations, we’re your partner in creating the home you’ve always wanted.
On our “Our Projects” page, you can explore our past projects for inspiration. Then reach out through our “Contact/Follow Us” page to discuss your ideas. Let’s collaborate and create a space that truly reflects your style and needs!
You can also see some of our reviews from clients here. This will give you a sense of their experience working with us;
